react-native-aaiios-liveness-sdk(v2.0.7)
Migration Guides
From v2.0.1, we refactored the code and aligned most of the js api with the android side, so please refer to the table below when migrating from the old version to v2.0.1.
old method name new method name NativeModules.RNAAILivenessSDK.initWithMarket("your-market") AAIIOSLivenessSDK.initSDKByLicense("your-market", false) NativeModules.RNAAILivenessSDK.initWithMarketAndGlobalService("your-market", isGlobalService) AAIIOSLivenessSDK.initSDKByLicense("your-market", isGlobalService) NativeModules.RNAAILivenessSDK.init("your-access-key", "your-secret-key", "your-market") AAIIOSLivenessSDK.initSDKByKey("your-access-key", "your-secret-key", "your-market", false) NativeModules.RNAAILivenessSDK.configDetectOcclusion(true) AAIIOSLivenessSDK.setDetectOcclusion(true) NativeModules.RNAAILivenessSDK.configResultPictureSize(600) AAIIOSLivenessSDK.setResultPictureSize(600) NativeModules.RNAAILivenessSDK.configUserId("your-reference-id") AAIIOSLivenessSDK.bindUser("your-reference-id") NativeModules.RNAAILivenessSDK.configActionTimeoutSeconds(10) AAIIOSLivenessSDK.setActionTimeoutSeconds(10)
Download SDK
See this part to get SDK download link.
Running the example app
Download SDK and extract it, then go into the example directory:
cd exampleInstall packages:
yarn install
Go into the
iossubdirectory and install pod dependencies:cd ios && pod install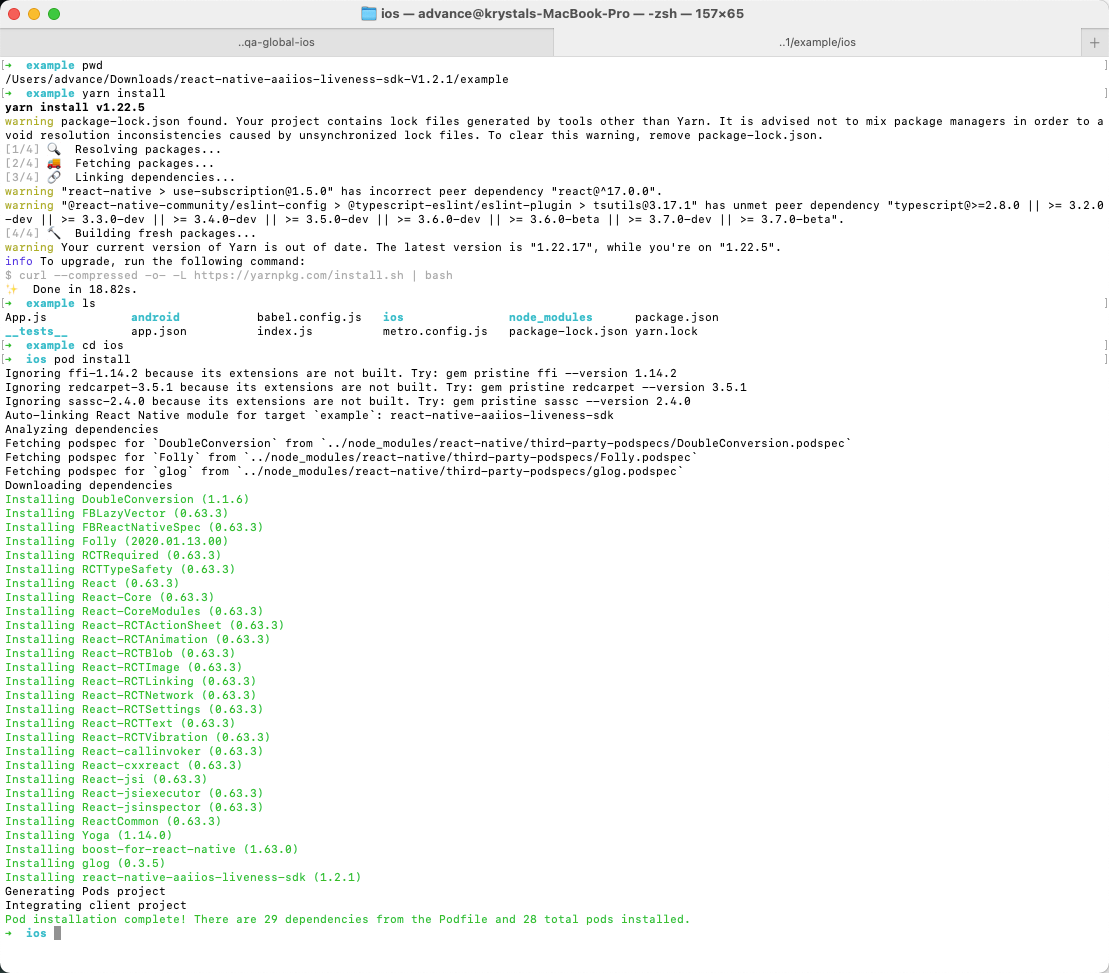
Go into the example directory and start Metro:
cd .. && yarn start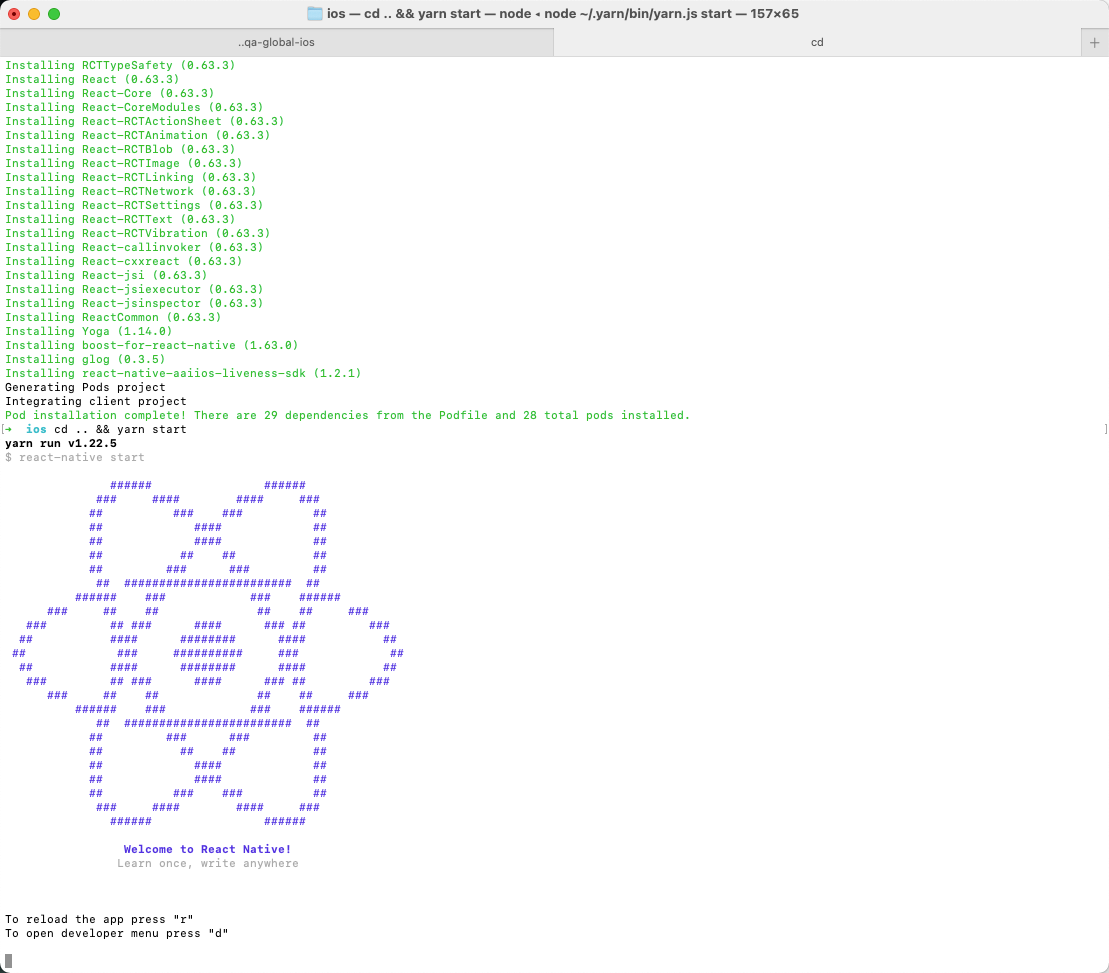
Modify
example/App.jsto specify your market and license content(The license content is obtained by your server calling our openapi).AAIIOSLivenessSDK.initSDKByLicense("AAILivenessMarketIndonesia", false)let licenseStr = 'your-license-str'AAIIOSLivenessSDK.setLicenseAndCheck(licenseStr, (result) => {...})run example app:
react-native run-iosor openexample.xcworkspacein Xcode and run.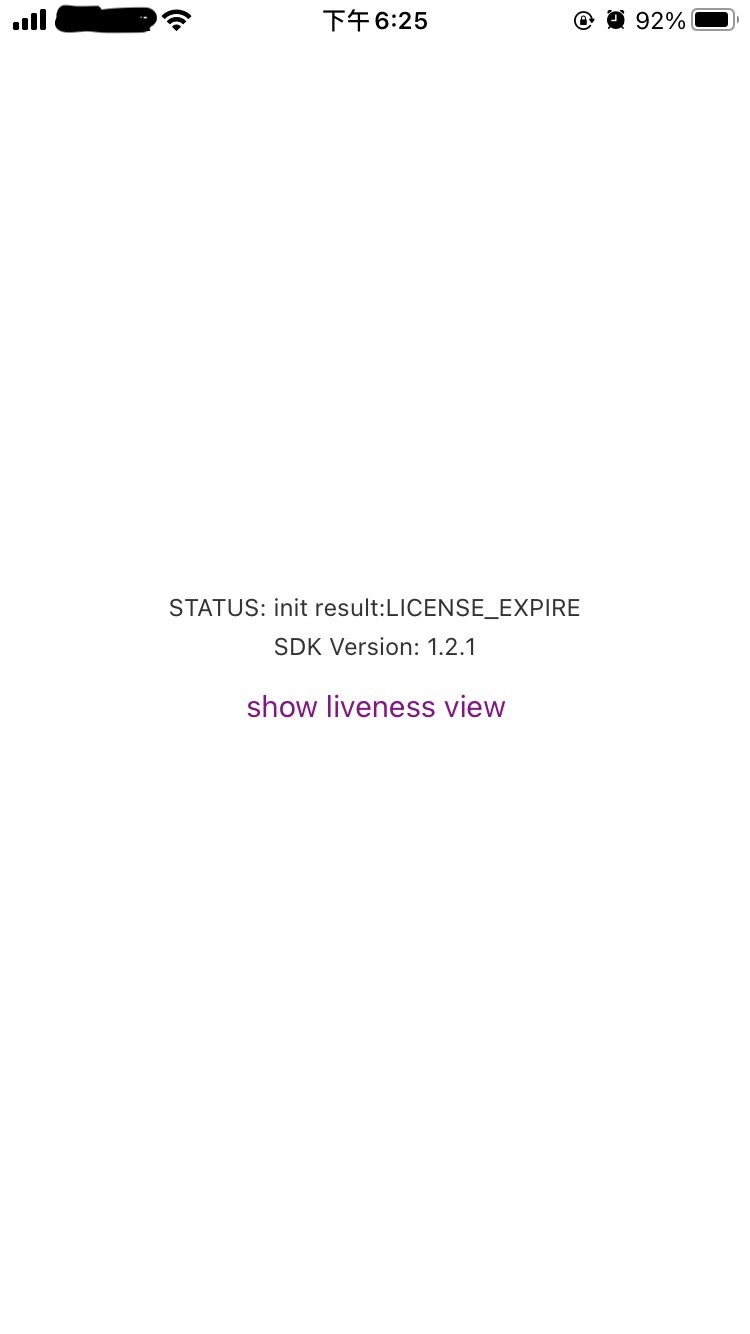
Getting started
Getting started (react-native >= 0.60)
If your react-navive version >= 0.60, you can refer this part to intergrate react-native-aaiios-liveness-sdk.
First rename the folder name
react-native-aaiios-liveness-sdk-V{sdkversion}toreact-native-aaiios-liveness-sdk, then we can try to integrate the SDK. There are two ways to integrate the SDK:As local package:
- Put the
react-native-aaiios-liveness-sdkfolder to your react-native project.
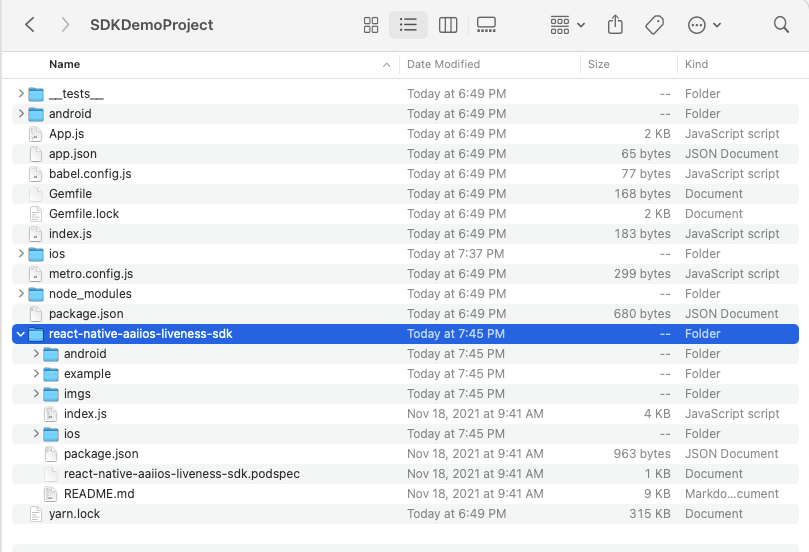
- cd your react-native project root path and link this local sdk package.
yarn add link:./react-native-aaiios-liveness-sdk
- Put the
As remote package:
- Upload all files in
react-native-aaiios-liveness-sdkfolder to your private git repository, make sure the name of your repository isreact-native-aaiios-liveness-sdk. - Navigate to the root directory of your react-native project and install SDK.
$ npm install git+ssh://git@{your-git-domain}:{your-git-user-name}/react-native-aaiios-liveness-sdk.git --save
- Upload all files in
Add pod dependencies
AAINetworkandAAILivenessto yourPodfile:target 'example' doconfig = use_native_modules!use_react_native!(:path => config["reactNativePath"])...pod 'AAINetwork', :http => 'https://prod-guardian-cv.oss-ap-southeast-5.aliyuncs.com/sdk/iOS-libraries/AAINetwork/AAINetwork-V1.0.0.tar.bz2', type: :tbzpod 'AAILiveness', :http => 'https://prod-guardian-cv.oss-ap-southeast-5.aliyuncs.com/sdk/iOS-liveness-detection/2.0.7/iOS-Liveness-SDK-V2.0.7.tar.bz2', type: :tbzendAfter integrate the SDK then we link SDK to iOS project.
cd ios && pod install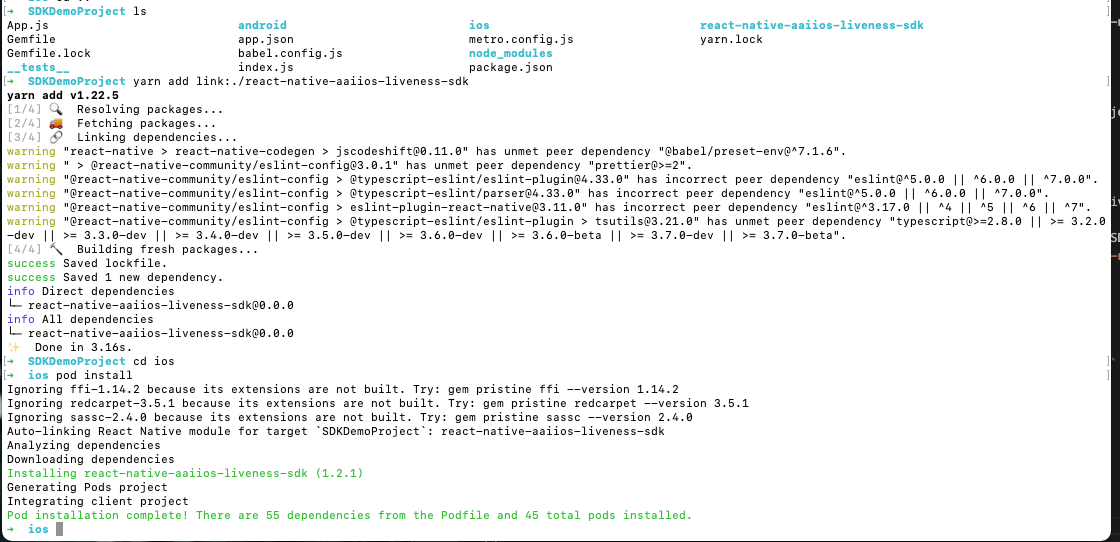
Then add camera and motion sensor (gyroscope) usage description in
Info.plistas bellow. Ignore this step if you have added those.<key>NSCameraUsageDescription</key><string>Use the camera to detect the face movements</string><key>NSMotionUsageDescription</key><string>Use the motion sensor to get the phone orientation</string>
Getting started (react-native < 0.60)
Download the AAILivenessSDK and AAINetwork, then extract them and add
AAILivenessSDKfolder,AAINetwork.xcframeworkto your project: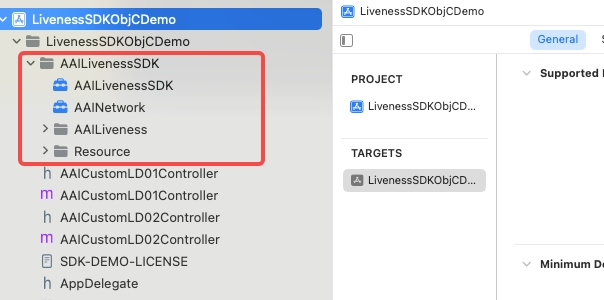
Add the
RNLivenessPluginfolder to your project.In Xcode, choose "TARGETS -> General" add the following system libraries and frameworks in the
Frameworks, Libraries, and Embedded Contentsection:libz.tbdlibc++.tbdAVFoundation.frameworkCoreMotion.frameworkSystemConfiguration.frameworkCoreTelephony.frameworkAccelerate.frameworkMetal.frameworkMetalKit.framework
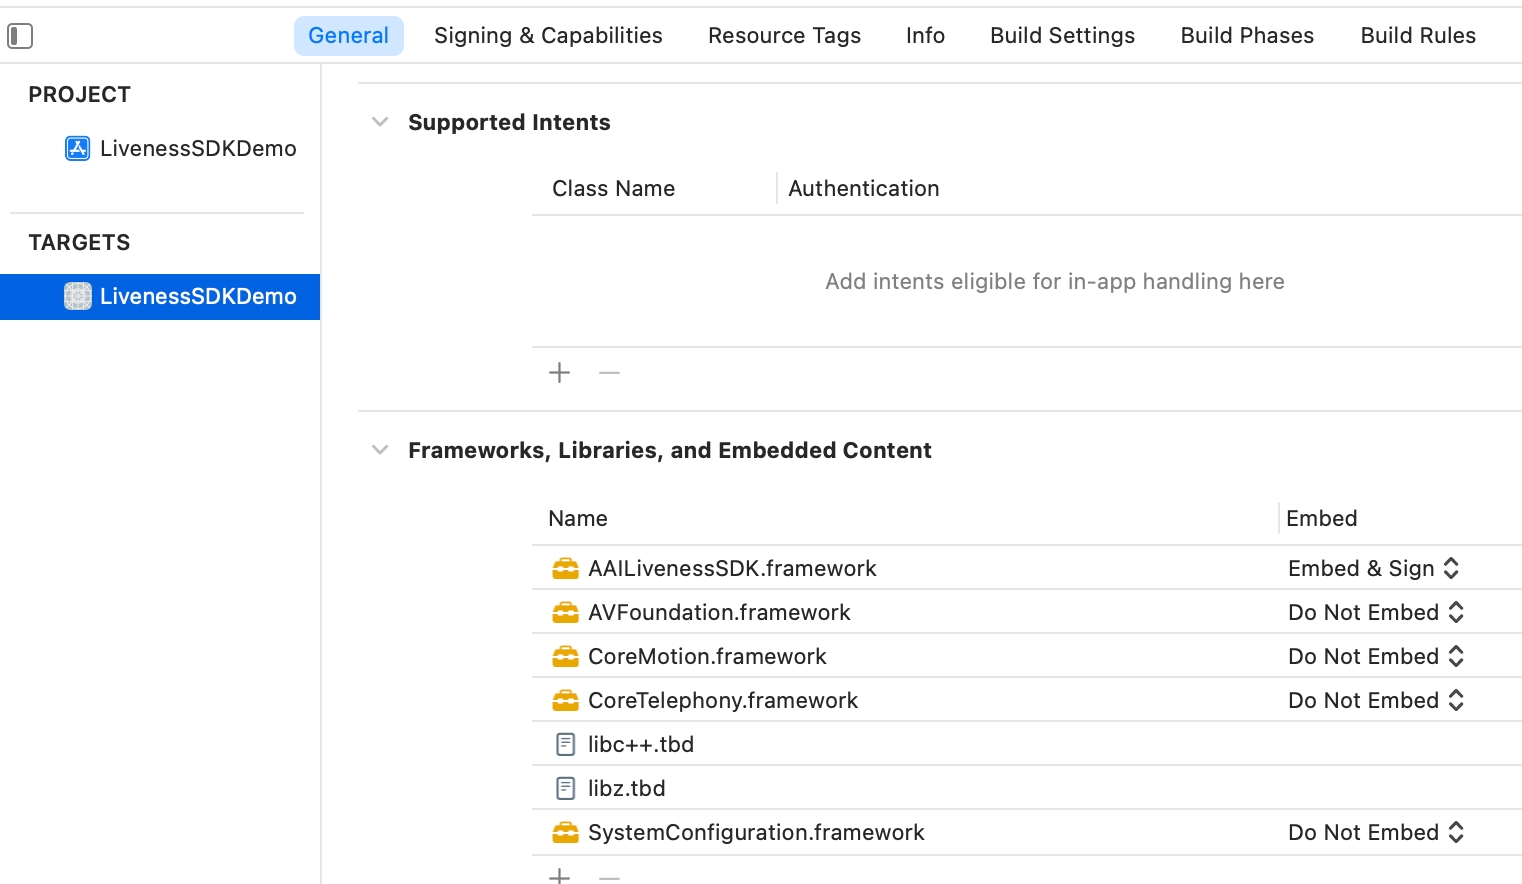
In Xcode, add camera and motion sensor (gyroscope) usage description in
Info.plistas bellow. Ignore this step if you have added those.<key>NSCameraUsageDescription</key><string>Use the camera to detect the face movements</string><key>NSMotionUsageDescription</key><string>Use the motion sensor to get the phone orientation</string>Rename
index.jstoAAIIOSLivenessSDK.js, then add thisjsfile to your react native project.
Usage
import AAIIOSLivenessSDK from 'react-native-aaiios-liveness-sdk';// Import SDK (react-native < 0.60)//import AAIIOSLivenessSDK from '{your AAIIOSLivenessSDK.js path}';
  SDKTest() {    /*    /// Optional     // Get SDK version    AAIIOSLivenessSDK.sdkVersion((message) => {      console.log("SDK version is ", message)    });    */
    // Step 1. Initialize SDK    // The last boolean value represents whether the Global service is enabled or not, and is set to true if it is, or false if it is not.    // Market available value are as follows:    // AAILivenessMarketIndonesia    // AAILivenessMarketIndia    // AAILivenessMarketPhilippines    // AAILivenessMarketVietnam    // AAILivenessMarketThailand    // AAILivenessMarketMexico    // AAILivenessMarketMalaysia    // AAILivenessMarketPakistan    // AAILivenessMarketNigeria    // AAILivenessMarketColombia    // AAILivenessMarketSingapore    AAIIOSLivenessSDK.initSDKByLicense("AAILivenessMarketIndonesia", false)
    /*    /// Optional     // Configure SDK detection level    // Available levels are "EASY", "NORMAL", "HARD". Default is "NORMAL".    // Note that this method must be called before "setLicenseAndCheck", otherwise it won't take effect.    AAIIOSLivenessSDK.setDetectionLevel("NORMAL")    */
    /*    /// Optional     // Set wheher to detect occlusion. Default is false.    AAIIOSLivenessSDK.setDetectOcclusion(true)    */
    /*    /// Optional     // Set action detection time interval. Default is 10s.    // Note that this value represents the timeout for a motion,    // not the total timeout for all motions.    AAIIOSLivenessSDK.setActionTimeoutSeconds(10)    */
    /*    /// Optional     // Set the size(width) of output `img` in `onDetectionComplete`.     // Image size(width) should be in range [300, 1000], default image size(width) is 600(600x600).    AAIIOSLivenessSDK.setResultPictureSize(600)    */
    /*    /// Optional    // Set the action sequence. Available action type are "POS_YAW", "BLINK", "MOUTH"    // the first boolean value indicates if the given actions should be shuffled.    // Default action sequence ["POS_YAW", "BLINK"] and the order of them is random.    AAIIOSLivenessSDK.setActionSequence(true, ["POS_YAW", "BLINK", "MOUTH"])    */
    /*    /// Optional    // User binding (strongly recommended).    // You can use this method to pass your user unique identifier to us,     // we will establish a mapping relationship based on the identifier。    // It is helpful for us to check the log when encountering problems.    AAIIOSLivenessSDK.bindUser("your-reference-id")    */
    // Step 2. Configure your license(your server needs to call openAPI to obtain license content)    AAIIOSLivenessSDK.setLicenseAndCheck("your-license-content", (result) => {      if (result === "SUCCESS") {        showSDKPage()      } else {        console.log("setLicenseAndCheck failed:", result)      }    })
  }
  showSDKPage() {    var config = {      /*      /// Optional      showHUD: true,      */
      /*      /// Optional      /// Specify which language to use for the SDK. If this value is not set,      /// the system language will be used by default. If the system language is not supported,      /// English will be used.      ///      /// The languages currently supported by sdk are as follows:      ///       /// "en" "id"  "vi"  "zh-Hans"  "th"  "es"  "ms" "hi"      language: "en",      */
      /*      /// Optional      /// Set the timeout for prepare stage, default is 10s.      ///      /// This value refers to the time from when the sdk page is displayed to when the motion detection is ready.      /// For example, after the sdk page is presented, if the user does not hold the phone upright or put the face in the detection area,      /// and continues in this state for a certain period of time, then the `onDetectionFailed` will be called,      /// and the value of the "errorCode" is "fail_reason_prepare_timeout".      prepareTimeoutInterval: 10,      */
      /*      /// Optional      // Set the color of the round border in the avatar preview area. Default is clear color(#00000000).      roundBorderColor: "#00000000",      */
      /*      /// Optional      // Set the color of the ellipse dashed line that appears during the liveness detection. Default is white color.      ellipseLineColor: "#FFFFFF",      */
      /*      /// Optional      // Whether to animate the presentation. Default is true.      animated: true,      */
     /*      /// Optional      // Whether to display animation images. Default is true. If you set false, then animation images will be hidden.      showAnimationImgs: true,      */         /*      /// Optional      // Whether to allow to play prompt audio. Default is true.      playPromptAudio: true,      */    }
    // Step 3. Configure callback    var callbackMap = {      // Optional      onCameraPermissionDenied: (errorKey, errorMessage) => {        console.log(">>>>> onCameraPermissionDenied", errorKey, errorMessage)        this.setState({message: errorMessage})      },
      // Optional      /*      For `livenessViewBeginRequest` and `livenessViewEndRequest`,       these two methods are only used to tell you that the SDK is going to start sending network requests and end network requests,       and are usually used to display and close the loadingView, that is, if you pass showHUD: false, then you should in method `livenessViewBeginRequest` to show your customized loading view      and close loading view in method `livenessViewEndRequest`. If you pass showHUD: true, then you do nothing in these two methods.      */      livenessViewBeginRequest: () => {        console.log(">>>>> livenessViewBeginRequest")      },
      // Optional      livenessViewEndRequest: () => {        console.log(">>>>> livenessViewEndRequest")      },
      // Required      onDetectionComplete: (livenessId, base64Img) => {        console.log(">>>>> onDetectionComplete:", livenessId)         /*          You need to give the livenessId to your server, then your server will call the anti-spoofing api to get the score of this image.          The base64Img size is 600x600.          */         this.setState({message: livenessId})      },
      // Optional       /*      The error types are as follows, and the corresponding error messages are in the language file of the `Resource/AAILanguageString.bundle/id.lproj/Localizable.strings` (depending on the language used by the phone)
      fail_reason_prepare_timeout      fail_reason_timeout      fail_reason_muti_face      fail_reason_facemiss_blink_mouth      fail_reason_facemiss_pos_yaw      fail_reason_much_action
      In fact, for the type of error this function gets, you don't need to pay attention to it, just prompt the error message and let the user retry.      */      onDetectionFailed: (errorCode, errorMessage) => {        console.log(">>>>> onDetectionFailed:", errorCode, errorMessage)        this.setState({message: errorMessage})      },
      // Optional       /*      This means sdk request failed, it may be that the network is not available, or account problems, or server errors, etc.       You only need to pay attention to the `errorMessage` and `transactionId`, `transactionId` can be used to help debug the specific cause of the error, generally just prompt the errorMessage.      */      onLivenessViewRequestFailed: (errorCode, errorMessage, transactionId) => {        console.log(">>>>> onLivenessViewRequestFailed:", errorCode, errorMessage, transactionId)        this.setState({message: errorMessage})      },
      // Optional       // This means that the user tapped the back button during liveness detection.      onGiveUp: () => {        console.log(">>>>> onGiveUp")        this.setState({message: "onGiveUp"})      }    }
    AAIIOSLivenessSDK.startLiveness(config, callback)  }
Change logs and release history
v2.0.7 Download
- Sync native SDK.
v2.0.6 Download
- Sync native SDK.
v2.0.5 Download
- Sync native SDK.
v2.0.4 Download
- Sync native SDK.
- Add configuration items
playPromptAudioandshowAnimationImgs.
v2.0.3 Download
- Sync native SDK.
v2.0.2 Download
- Sync native SDK.
v2.0.1 Download
- Refactored the code.
v1.3.4 Download
- Fix bugs.
v1.3.3 Download
- Optimizing the capture of face image.
- Support closed eye detection.
- Add localized string "pls_open_eye".
- Fix EXC_BAD_ACCESS bug that could occur in some cases.
- Fix the global service bug.
- Compressed images of AAIImgs.bundle.
- Removed 'android' folder.
v1.2.9.1 Download
- Fixed the bug that the audio could not be automatically switched with the language.
v1.2.9 Download
- Support setting
languageandprepareTimeoutInterval.
v1.2.8 Download
- Upgrade network module.
v1.2.1 Download
- Fix the bug that img of AAILivenessResult may be nil when the onDetectionComplete: method is called.
v1.2.0 Download
Support to initialize SDK with license.
NativeModules.RNAAILivenessSDK.initWithMarket("your-market")NativeModules.RNAAILivenessSDK.configLicenseAndCheck("your-license-content", (result) => {if (result === "SUCCESS") {// SDK init success}})Support face occlusion detection(only in the preparation phase, not in the action detection phase), this feature is off by default, you can turn it on if needed.
NativeModules.RNAAILivenessSDK.configDetectOcclusion(true)Support Mexico,Malaysia,Pakistan,Nigeria,Colombia.
Compliance Explanation
See Compliance Explanation for more details.